
Editing.
Intro to Editing.
The purpose of this editing workflow is to shape our images from clay into efficient masterpieces that carry the message of Jesus. It is meant to allow our Photo Team to produce/organize assets in order to better source our Comms Team and make our goods accessible from our image archives when we receive requests to use them, create graphics, videos, prints, etc.
The simplest way for our team to do this is to:
1) Make sure that every file uploaded to Box Sync has been formatted with a new, dated filename (ie. YYYYMMDD_originalfilename) to better ensure accuracy when searching for images and solve our problems with having multiple files with the same name.
2) Staying consistent with the folder structure and upload formats. (Parent folder named YYYYMMDD_keyword, with two folders inside: RAWS & OUTPUT)
As part of the editing workflow on the photo team, Hillsong East Coast uses various editing and archiving programs to better serve our church and communications team. The following document will guide you through this process using the following programs:

Box.
Box.com | TO ARCHIVE
This is where we store all of our images in a master archive.
Ask your editor for access in order to be able to drop the pictures you take while volunteering.

Lightroom.
Catalog Below | TO EDIT
It simplifies the editing and exporting standards.
Our editing presets can be easily shared within of our team and adjusted as our storytelling evolves.

Fluro.
app.fluro.io | TO SHARE
This is where we send images to populate into a global stream. Team leads and editors have access to this and are the ones who upload the local team’s photos for comms, staff and global teams to use.
Workflow
Editing.
Download the HSEC Lightroom Catalog
Use the the Color preset corresponding to your campus (ie. Hillsong NYC (Color)) and adjust for Exposure and White Balance.
Export using the Social Export Preset
Follow below to know where to export
Uploading to Box.
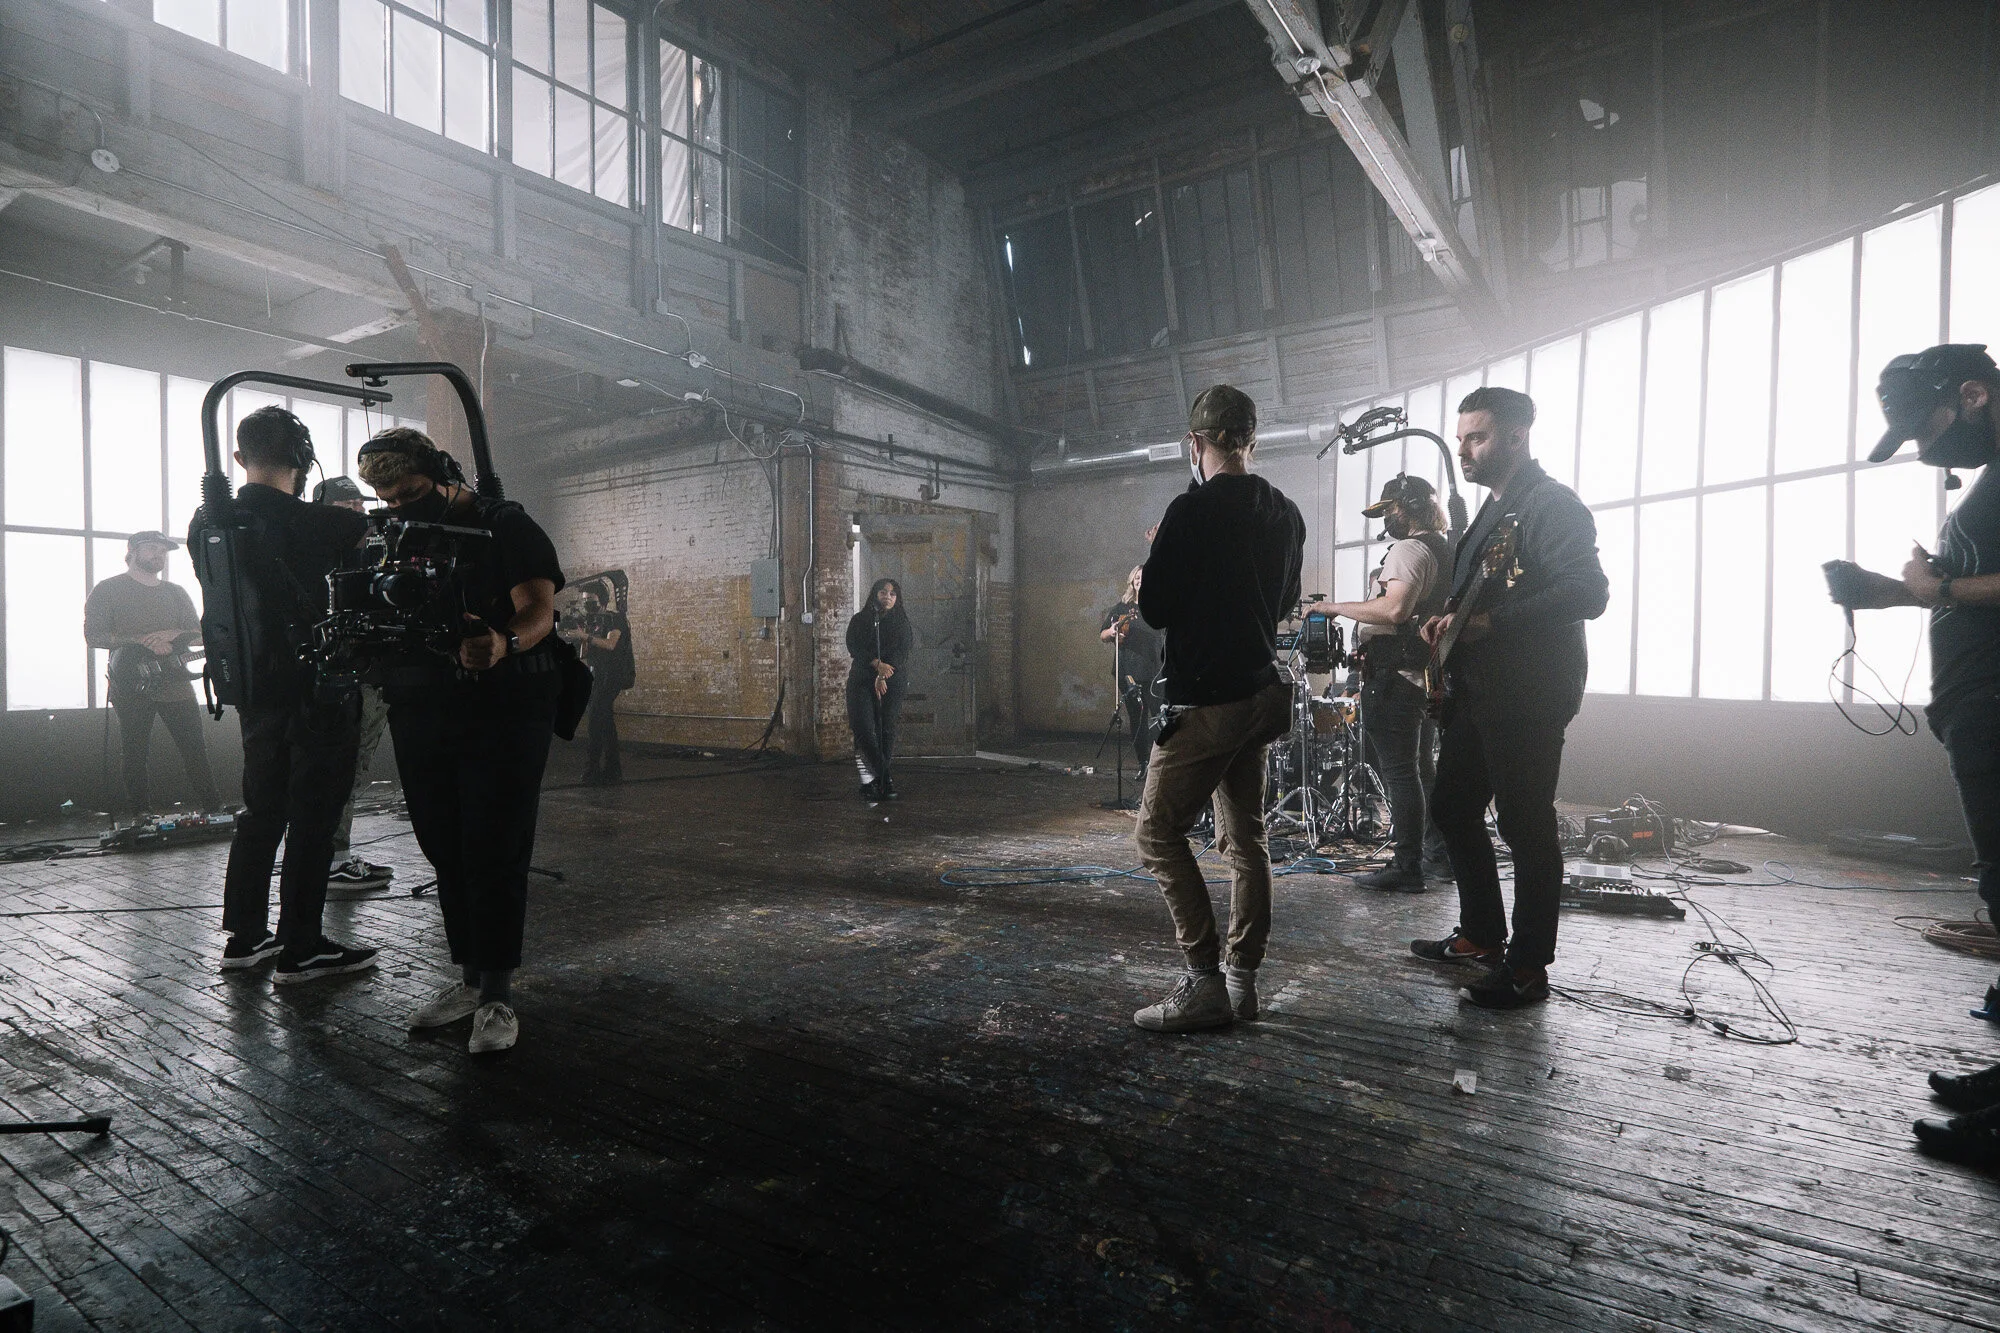
For anyone who has shoot any kind of event, campaign, etc.
This is the way we archive everything we shoot and how we get it from the photographers to the editors to carry on the baton of the stories we are telling.
After you finish shooting (or editing, if you're an editor):
1. Make sure every FILE is renamed like this: (date)YYYYMMDD_OriginalFileName.
If Lightroom hasn't renamed your files, remember to do it before uploading to Box.
DO NOT take out the filename generated by the camera when renaming the file.
Select the files, right click, rename, and use this option instead:

2. Make sure everything is put together in one FOLDER named: YYYYMMDD_KeyWord
(We always write the date in this order so that all the folders are organized the same way. The Key word should be the name of the event or something to easily identify the event. We don’t need anyone’s name on folders.)
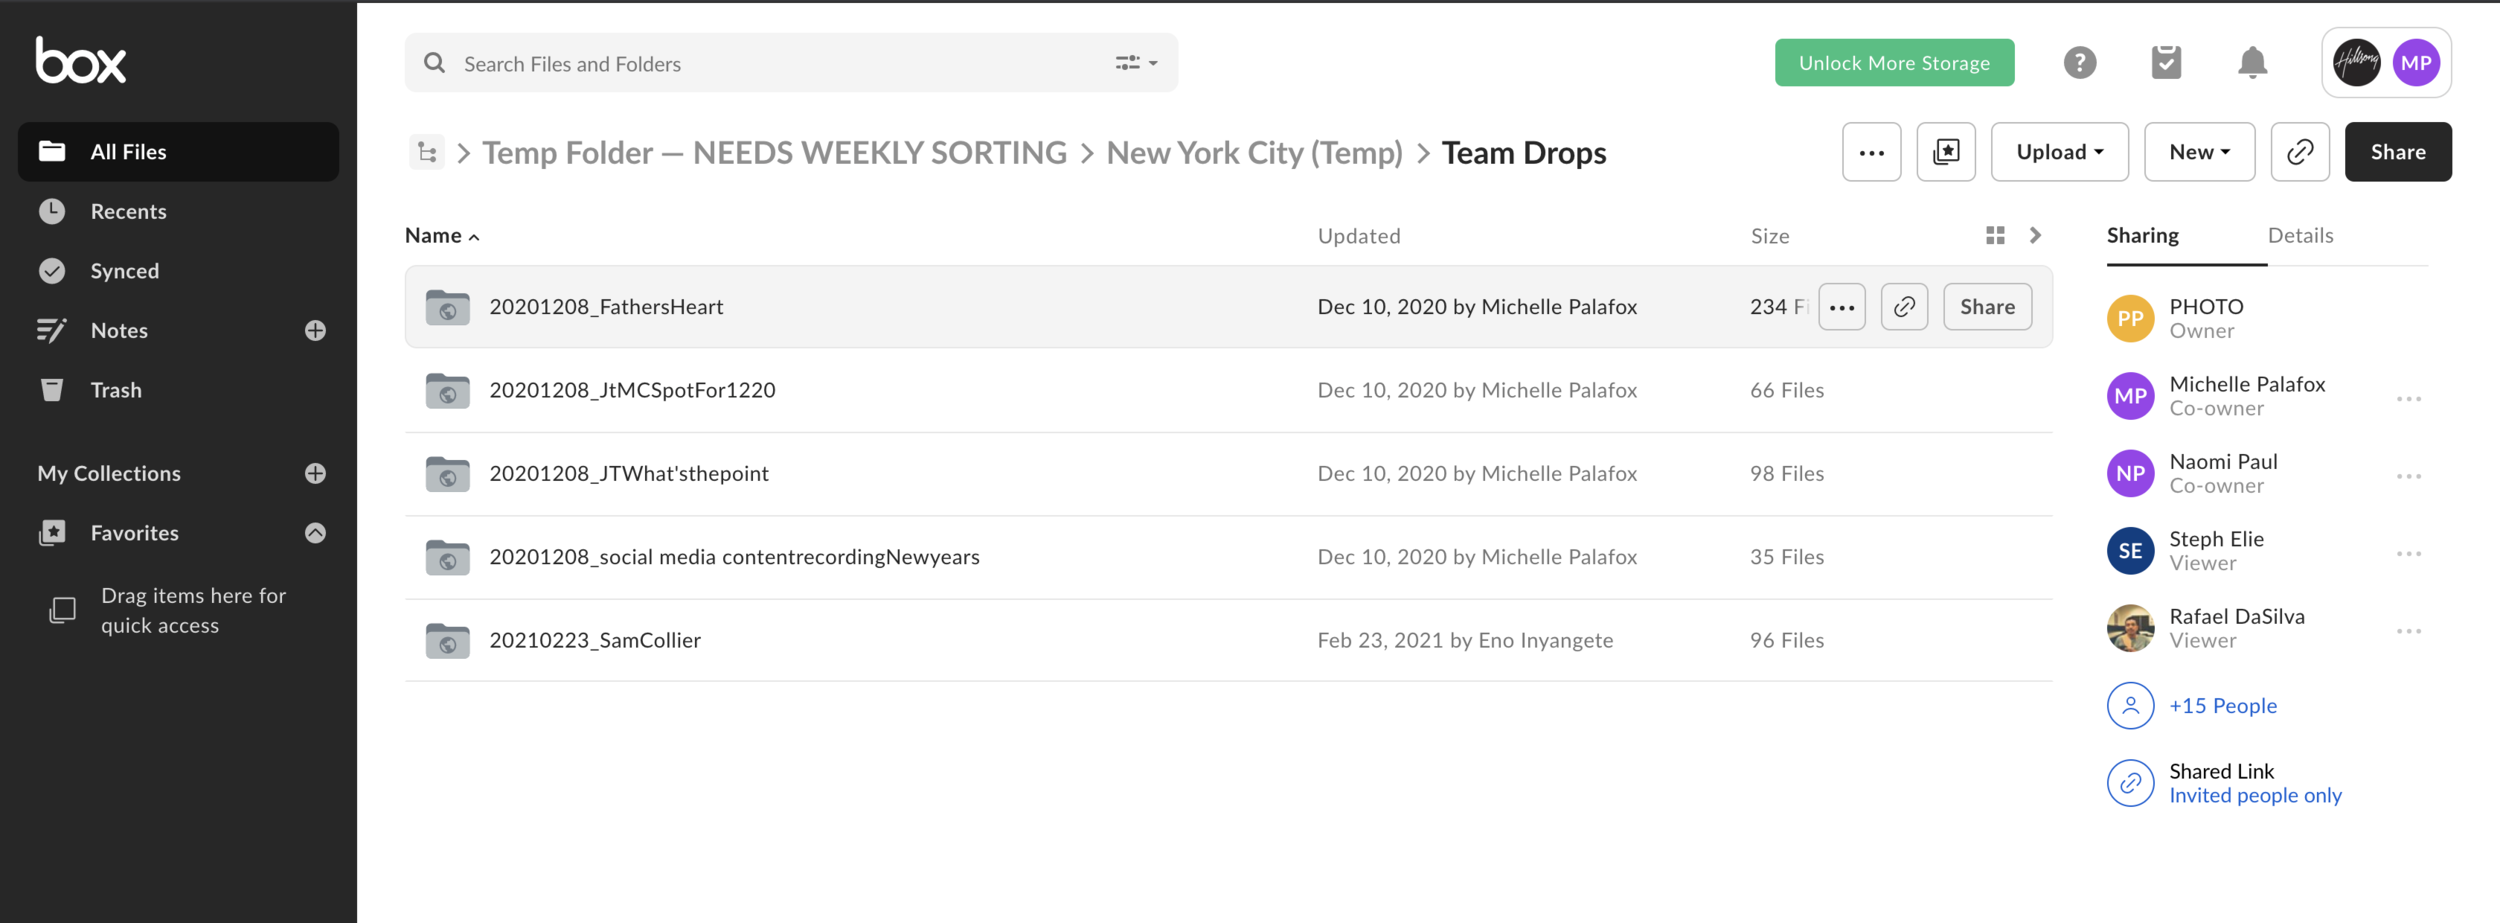
3. Inside the folder, separate Raw Files (Raws) and Exported Jpgs (OUTPUT) like so:

4. Click on your campus to be redirected to the corresponding Box Team Drops link.
(If you don’t have access to Box yet, please talk to your local team lead about it.)
You'll need to log in using your email and password. Drag and drop and shoot a text to your local team lead to let them know the files are uploaded.
After the upload is done, the files are now archived in Box!
THANK YOU!
Uploading to Fluro.
For editors with Volunteer Emails and Access to Fluro.
This is the way we share everything we shoot and how we get it from the editors to the designers to carry on the baton of the stories we are telling.
After you finish uploading to Box:
0. Photos have been
Edited and Uploaded to Box

1. Log in to app.fluro.io
2. On the upper-right corner, click UPLOAD

3. Click on NEW EVENT
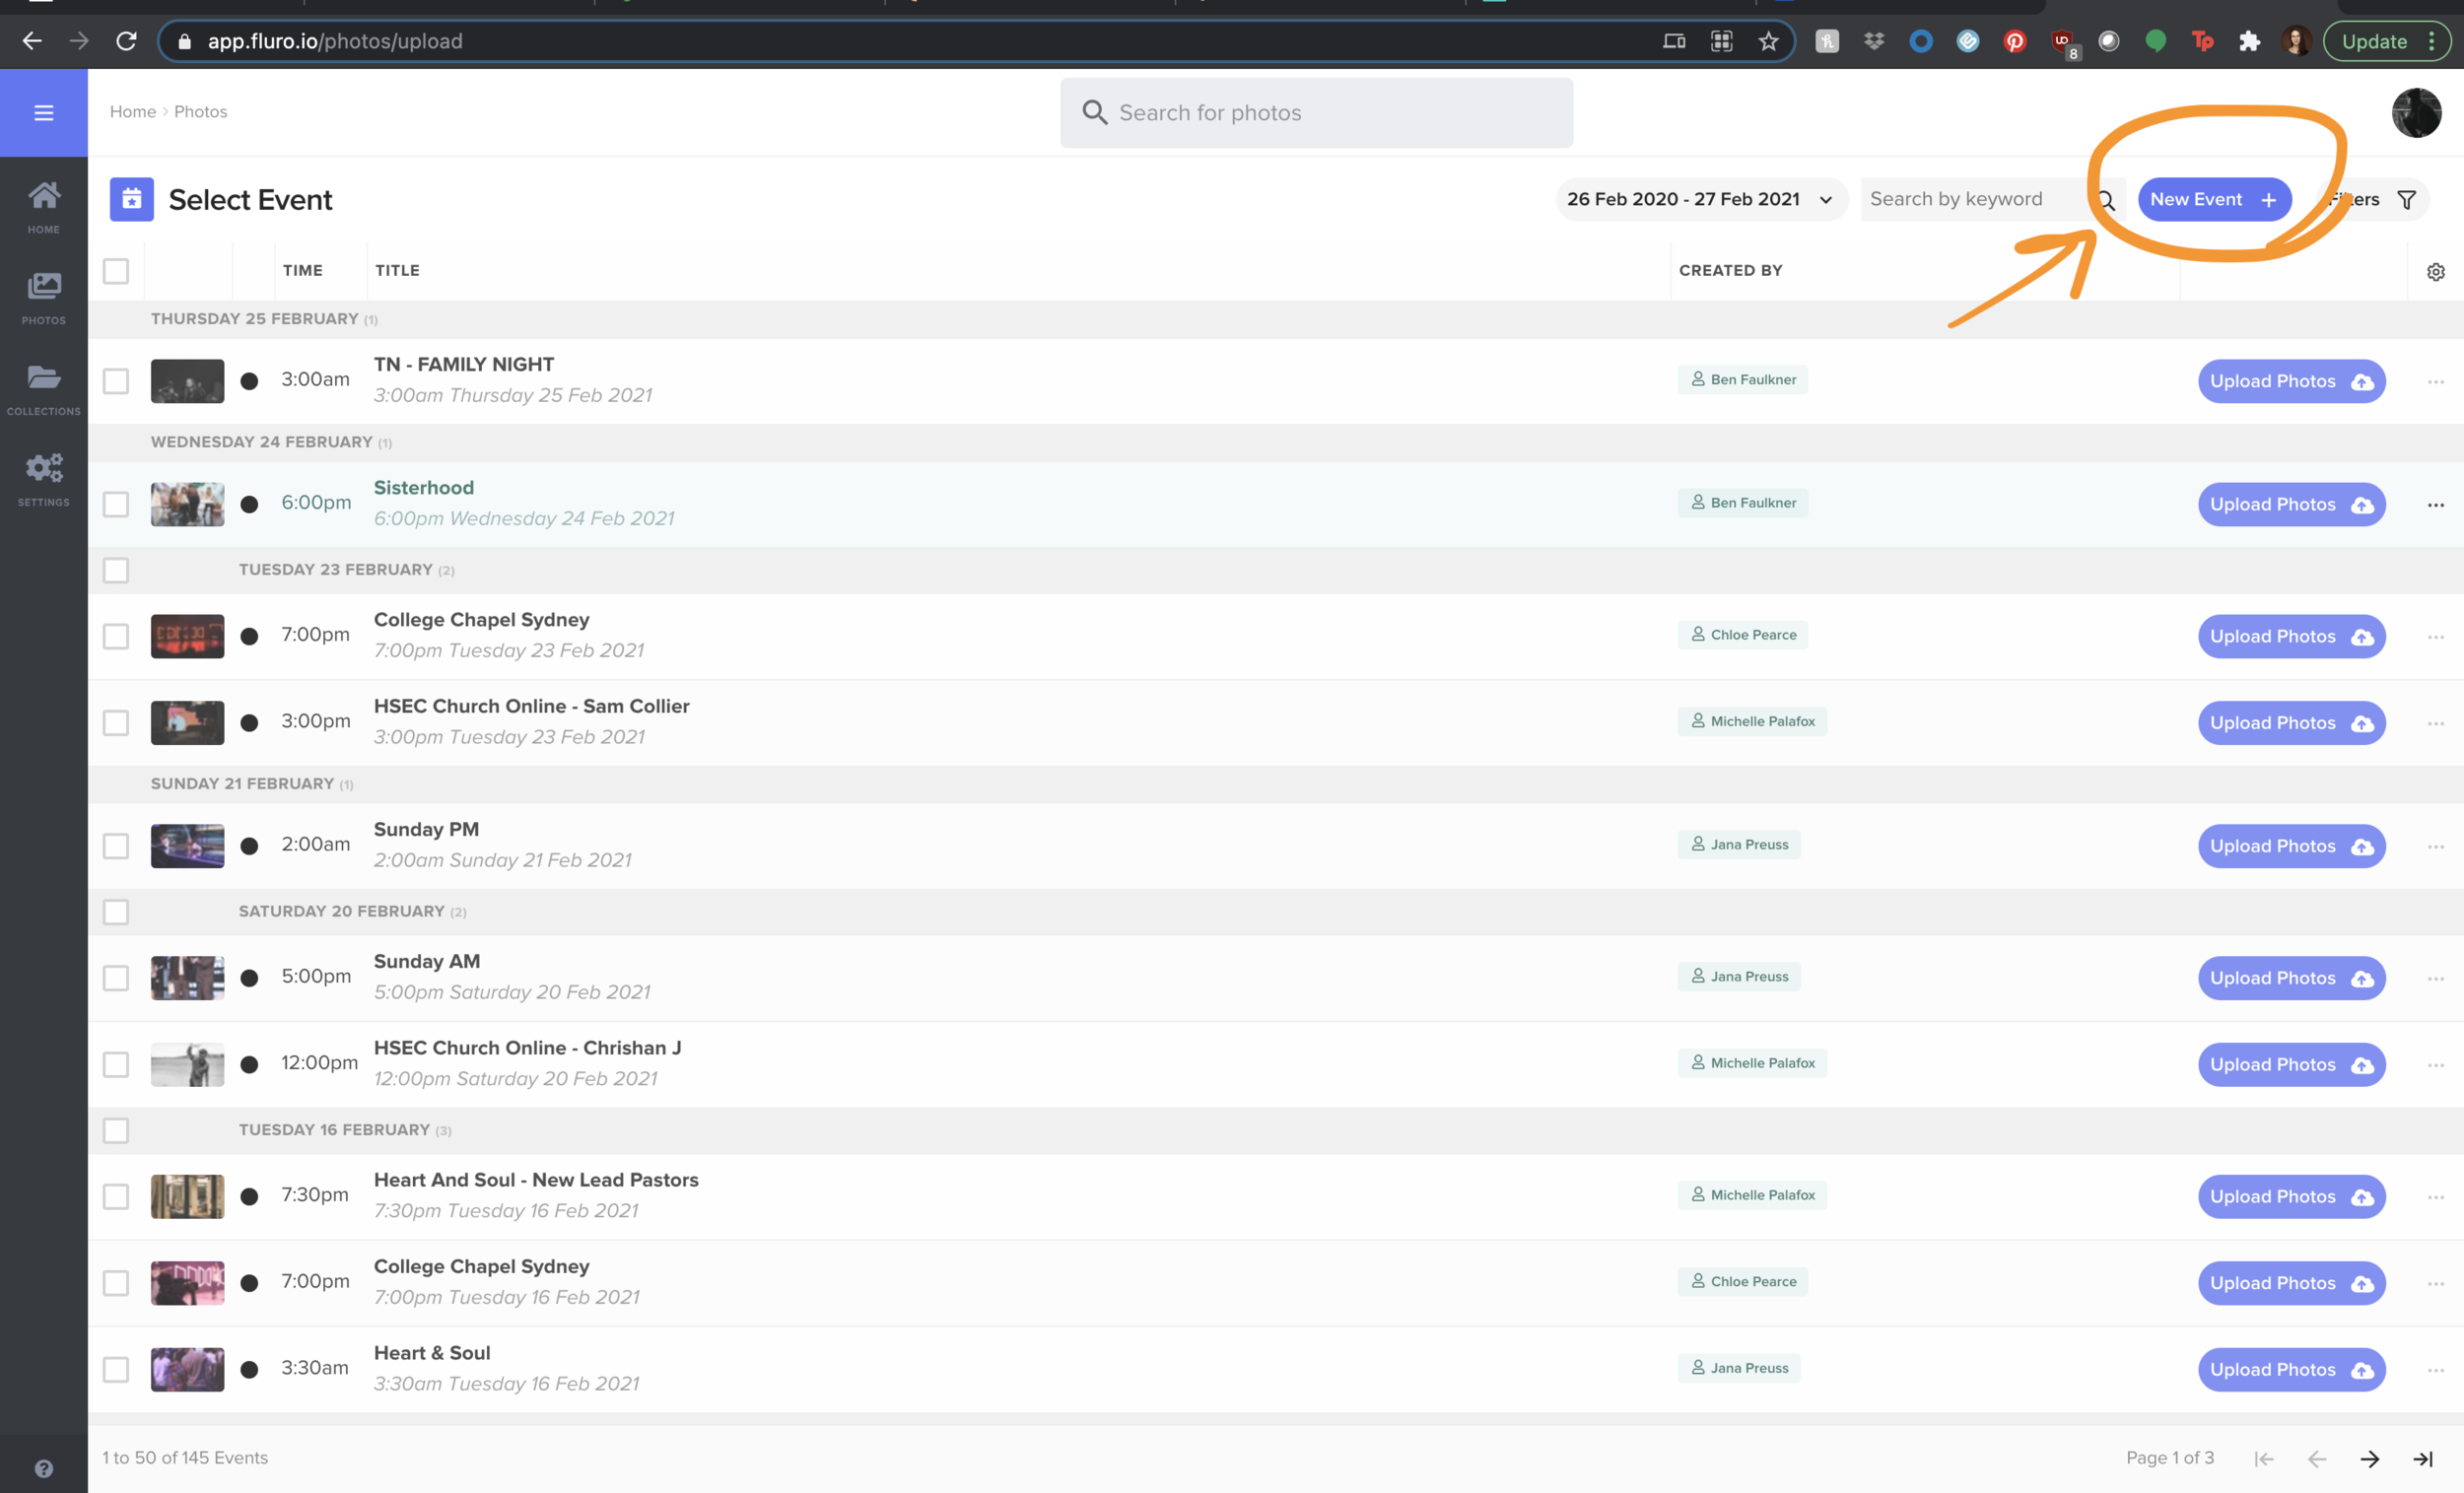
4. Fill out the information
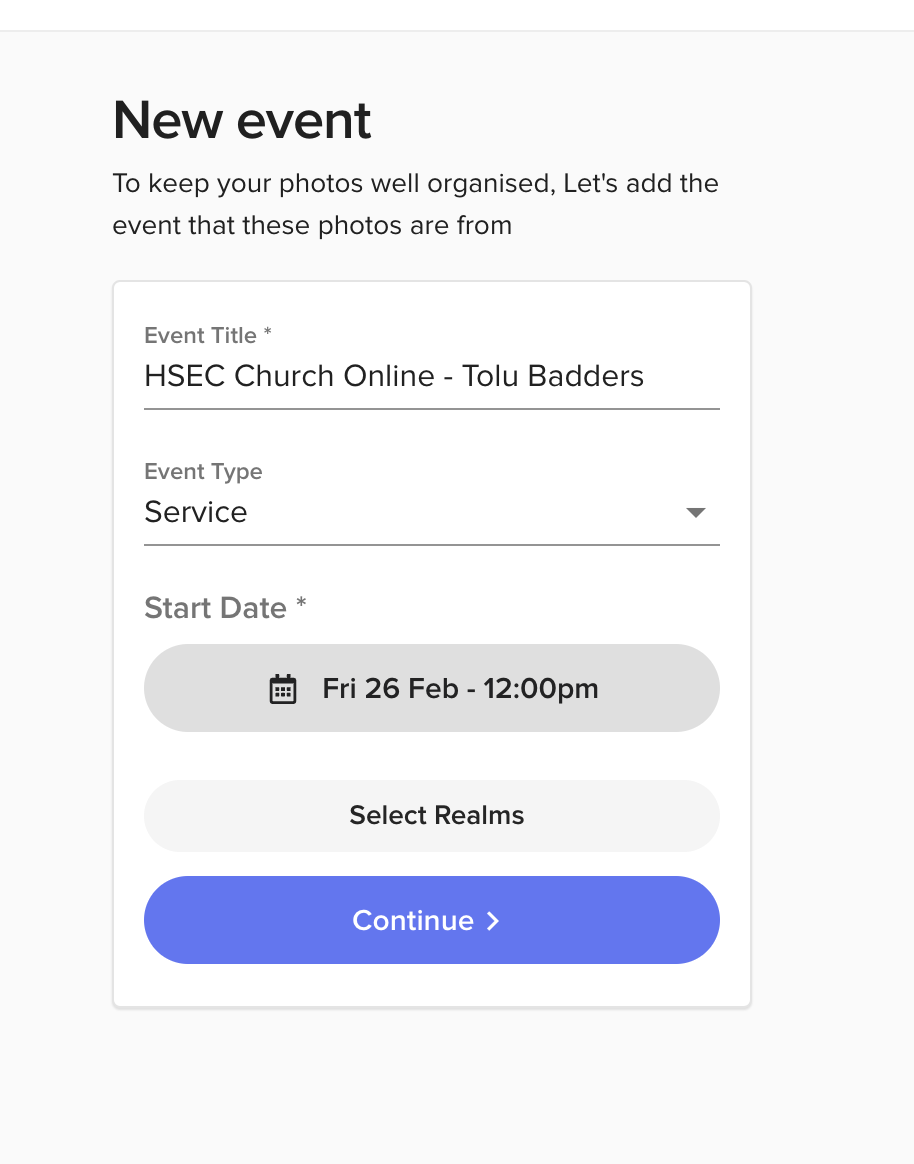
Always fill the Event Title with something relevant about what was shot (ie. who preached, theme of worship shoot if any, anyone who partnered with us, etc.)
Examples of recurrent events:
HSEC Church Online - Matt Bartgis
City Hope - Father's House
Event Type will depend on whether it pertained to a Service (whether online or in-person) or any other kind of event (which would fall under “General").
Always fill in Start Date with the date and time of Shooting (not uploading)
And see the next image for better understanding of Realms.
5. Select Realms
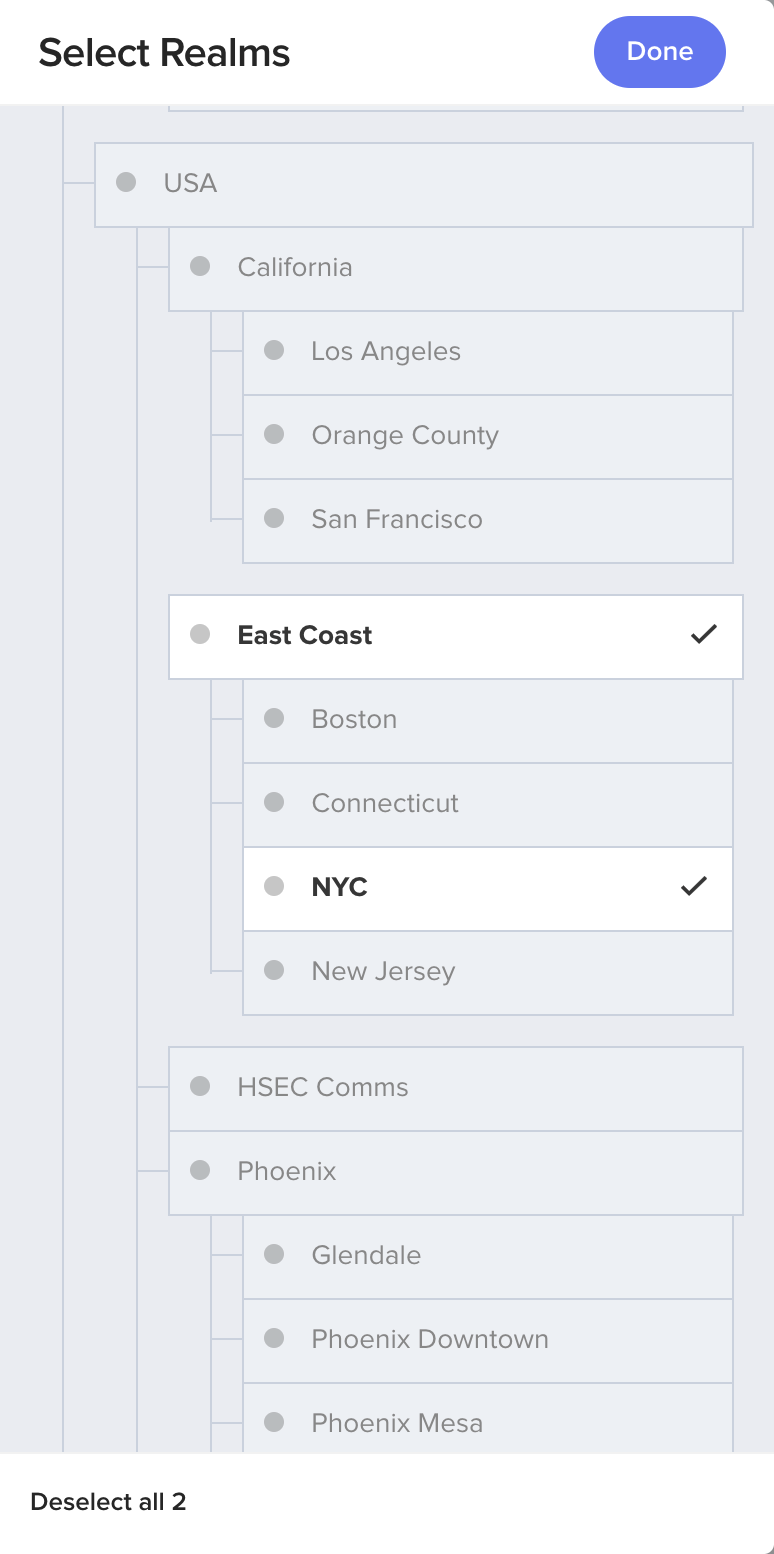
Realms are where photos will be stored within the Fluro Slipstream.
Choose East Coast as well as the City where the photos were taken, and click Done.
6. Drag and drop the exported JPG files

Once the folder is made, the information will appear on the upper left hand. If something you entered is incorrect, proceed to upload the images you have - but also notify your team lead so a correction can be made.
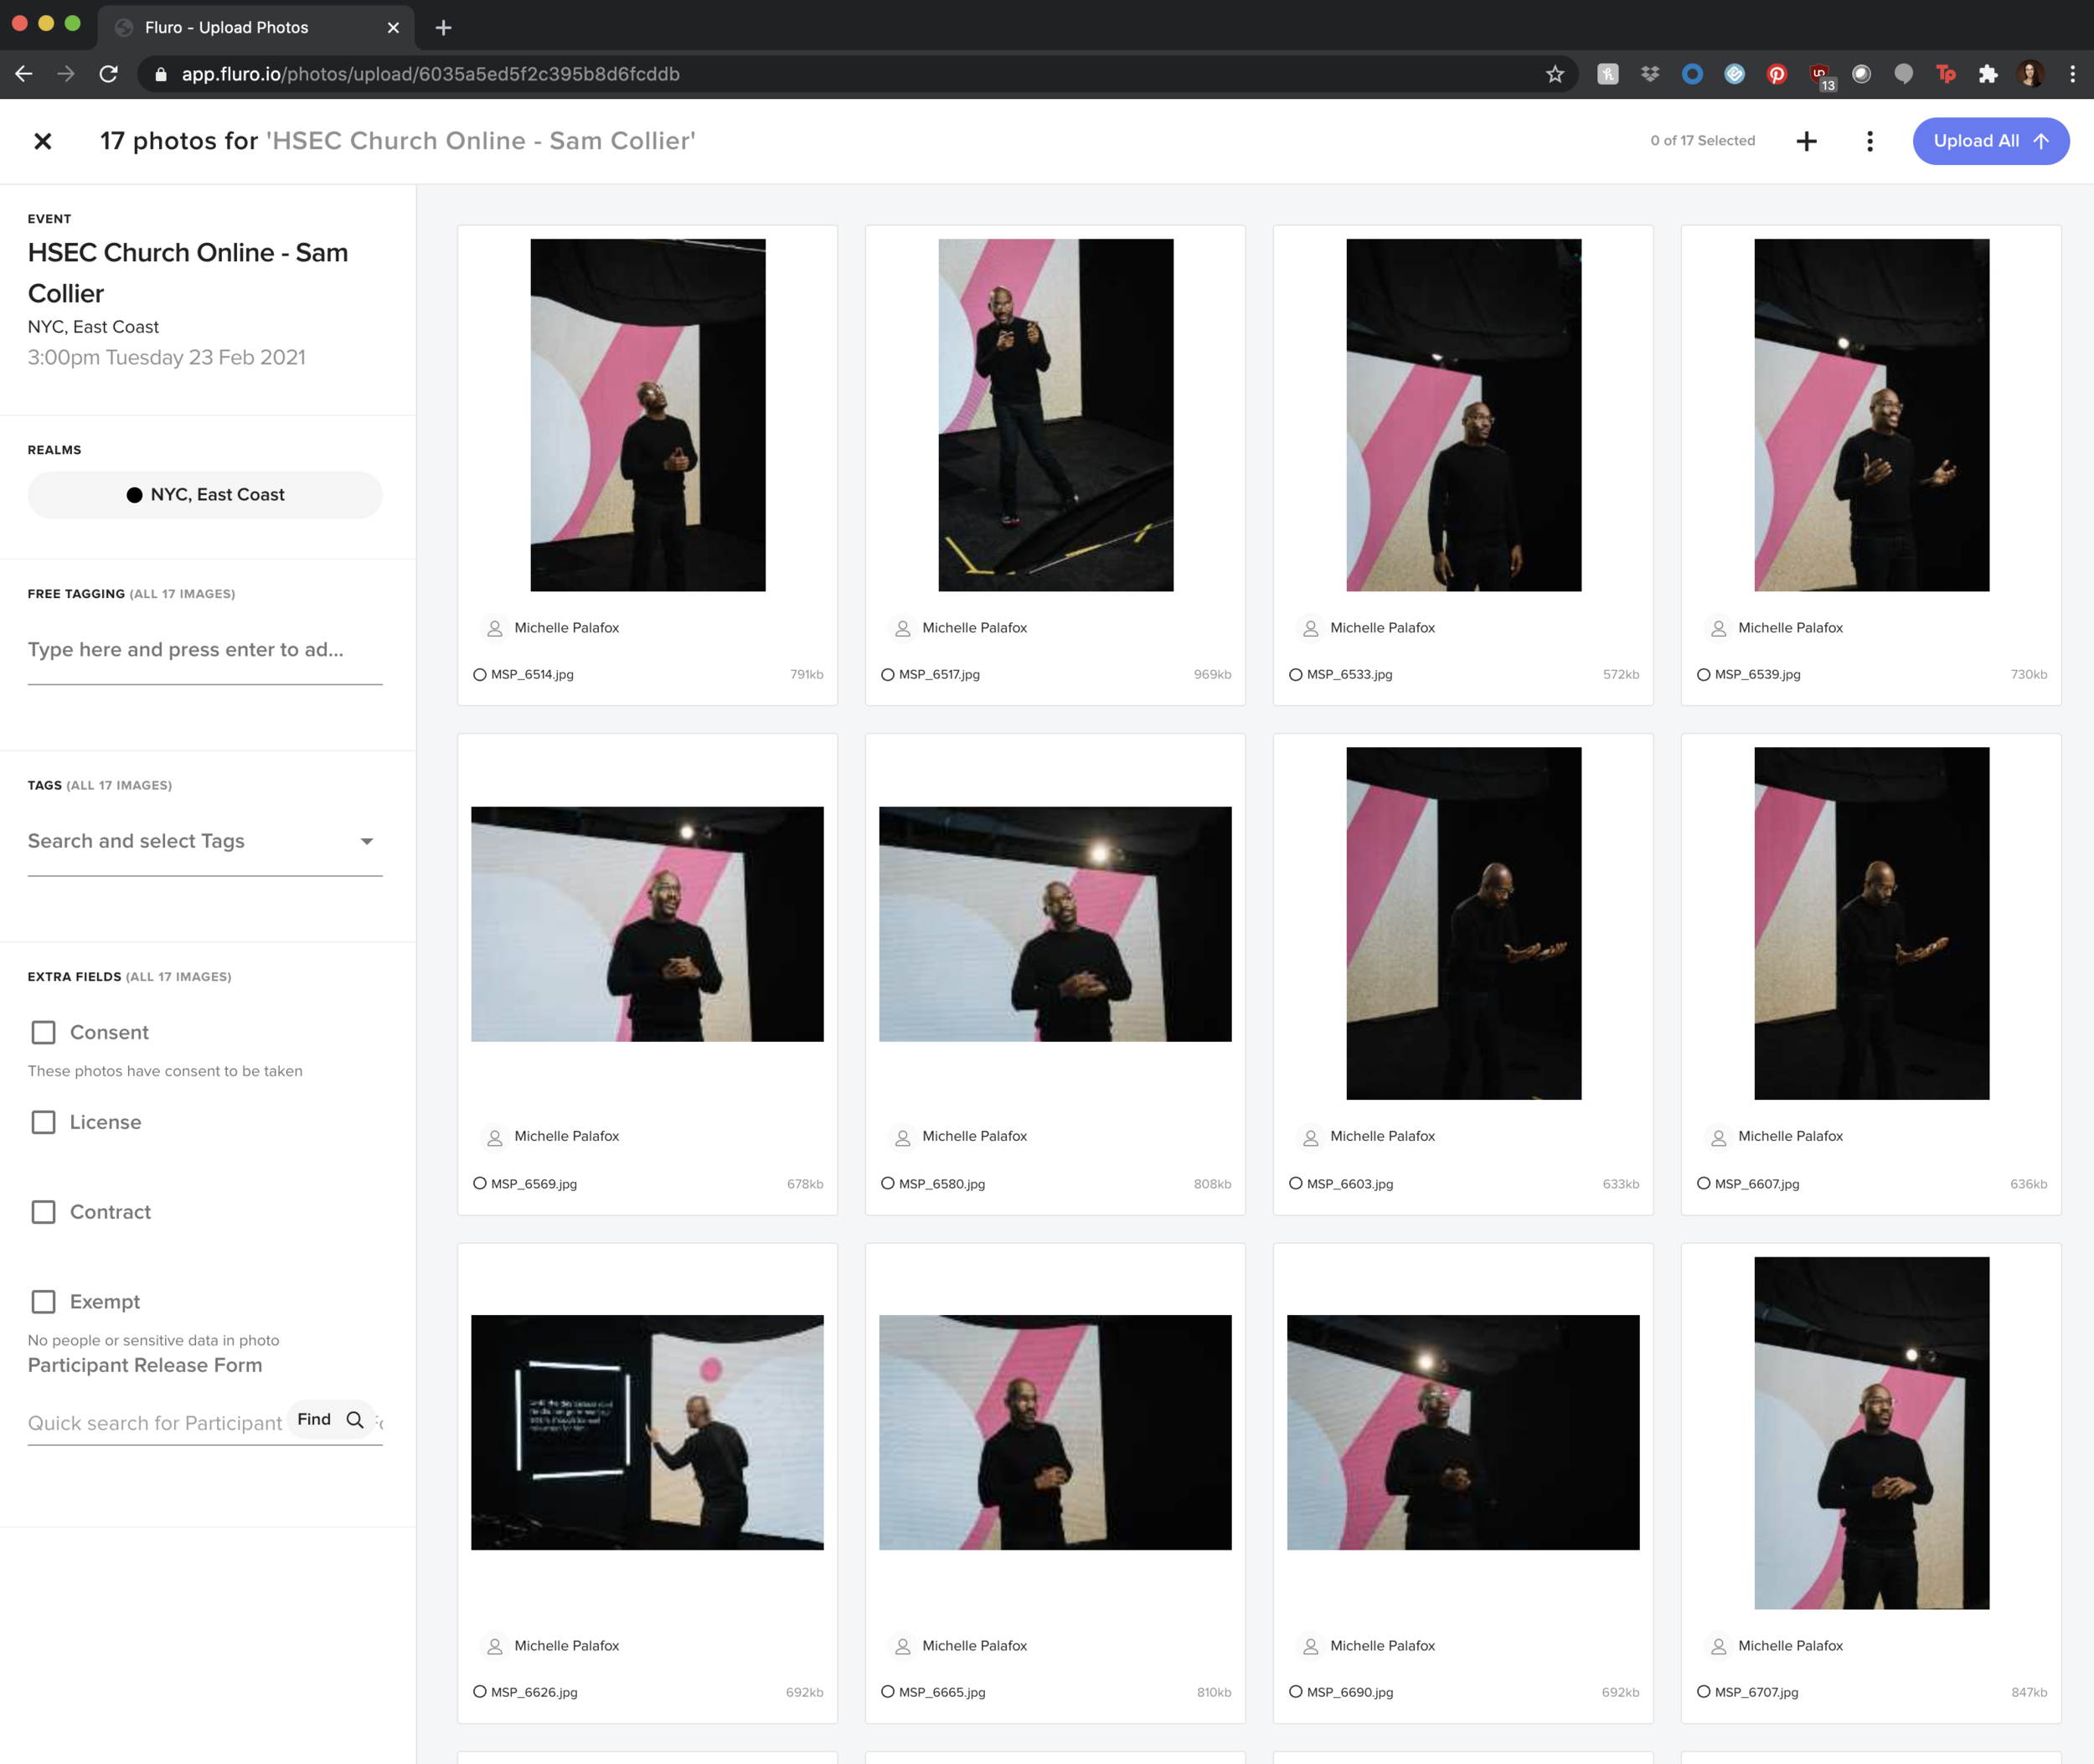
The images will appear right after - that does not mean they're uploaded.
7. Tag the images

We tag the photos so we can search for them smoothly after we have uploaded them (even years after).
Here is a Google Doc with templates of tags we can add according to what we are shooting:
HOW:
Tags are the tags saved that have been used in the past. Follow the google doc to search for them and you can add them by clicking on them once you localize them.
Free Tags are used when we are creating a NEW tag. These are good for any specific keyword to identify the event that we haven't created before or any new names of people we are tagging.